Log cabins are beautiful, sturdy homes that take us back to the pioneer days. Now, they have a life of their own and can range from the simple, classic design to the extravagant log mansions. No matter how big or small, ensuring that they are properly maintained and cared for is essential to the life of the logs and to the home itself.
It’s understandable to think that painting a log cabin exterior will protect the wood from the elements, sealing it against wind, rain and snow. On the contrary, painting the exterior will result in trapped moisture under the surface and eventually rotten logs. The solution is to stain the log cabin exterior using a versatile stain that offers superior protection and uncomplicated application.
Benefits of Staining a Log Cabin Exterior

The primary benefit of staining the exterior rather than applying log cabin paint is a stain’s ability to allow logs to breathe. Log cabin paint will seal the logs completely, trapping any moisture that’s already inside, leading to rot. Stain will repel moisture from the environment, allowing the logs to stay dryer and reducing their tendency to rot.
Aesthetically, stain will bring out the natural beauty of the wood itself, highlighting the grain and knots. Today’s stains come in a wide range of colors, so you can stain the logs lighter or darker, depending on the style of the home and your preferences. If you want to deviate from the traditional wood look, you can even choose black, gray, yellow, blue or red stains.
To ensure that the log cabin exterior will stand up to the elements and look beautiful for years to come, here are eight problems that you should avoid when preparing and staining the wood.
8 Problems to Avoid When Finishing a Log Cabin Exterior
1. Inadequate Preparation

Without proper preparation, the likelihood of a successful project can be greatly diminished. Preparation includes cleaning the wood to ensure it is free of dust, mold or mildew, pollen, bird droppings and old finishes — stain, paint, clear coat and any grease or oil spots. After cleaning the wood, sanding or media blasting will give the wood more texture which increases the stain’s longevity.
After prepping the wood, check it to ensure that the felting is removed. If it’s not, stain will adhere to the wood fuzz only to eventually fall off with it. This results in a mottled look that leaves areas of the wood exposed to sun, rain and wind.
2. Poor Adhesion
Poor adhesion can occur when the surface moisture content of the wood is higher than 15%. The lower the moisture content, the better adhesion you’re likely to get. When the moisture content is too high, the stain is more likely to peel and flake as the excess moisture escapes the wood.
3. Choosing an Incompatible Product
The product you choose should be compatible with the specific application. Finishing a log cabin exterior requires a product that is compatible with vertical, non-porous surfaces and contains inorganic pigments that help to preserve colors even in the face of sun, wind, rain, snow and other extreme weather conditions.
4. Not Testing the Product on the Exterior

The final look of the stain depends on the original wood as well as how well the wood has been cleaned and prepped. Make sure to prep the testing areas as you would the entire home to maintain as much consistency as possible.
Testing the product on multiple areas of the home and allowing it to dry for at least one hour will allow the client to see how the stain will look once it’s applied to the entire home. Not testing the product before applying it could result in an undesirable final product and require refinishing.
5. Proceeding Without Client Approval

After you’ve cleaned the wood and tested the product on a few inconspicuous spots, getting final client approval is paramount to a successful project. Since the look of the finish can vary depending on things like the wood, the location and the amount of light, it’s important to get final client approval before proceeding with the entire log cabin exterior.
6. Failing to Blend Multiple Batches
If you’re using more than one gallon of finish, blend the different batches to create a stain that will be uniform throughout the entire project. Failing to blend multiple batches can result in color variation that will be most obvious where the two stains meet.
7. Applying in the Wrong Conditions
Finishing a log cabin exterior requires some finesse, and waiting until the conditions are right will benefit the entire project. Stain should be applied to dry wood without the threat of rain or high wind for at least a few days. Try to apply the stain when the home is shaded so it doesn’t dry too quickly.
8. Choosing Paint Rather Than a High-Quality Stain
This one is listed last, but it is the most crucial mistake you can make when finishing a log cabin exterior: Painting a log cabin will result in trapped moisture that accelerates rot in the logs. This leads to more maintenance down the road as logs must be replaced, or worse, the log cabin is no longer safe to inhabit.
Finishing a Log Cabin Exterior the Right Way

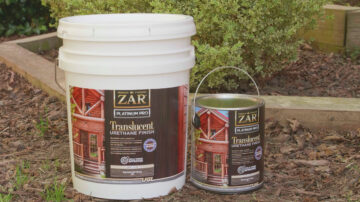
For the ultimate high-performance protection, ZAR® Platinum Pro Translucent Exterior Urethane Finish provides outstanding color retention for exterior applications. It is the optimal choice for pre-primed and unprimed wood as well as non-porous surfaces. Easy application, no sag and a quick drying time of 15 minutes make it the ideal choice for contractors who want to put their best foot forward.
Contact us today to explore a wide range of superior exterior stain options for your clients’ homes.