Crafting a professional finish on wood isn’t merely about applying a coat of stain. It’s about understanding the intricate process of how to prep wood for staining, assessing the material, cleaning, sanding, repairing and testing stain compatibility. In this comprehensive guide, we’ll look into the step-by-step methods of preparing your wood to receive a first-class finish!
6 Steps to Properly Prepare Wood for Staining

1. Assess the Wood
Before staining wood for a professional-looking finish, it’s crucial to properly assess the wood. Consider the following factors during preparation:
Type of Wood
Different woods respond differently to staining. Softwoods, like pine or spruce, absorb stain unevenly and may require a pre-stain conditioner. Hardwoods, like oak or maple, absorb stain more evenly.
Age of Wood
New wood, particularly if it is smooth and non-porous, may not absorb stain as well as older, more weathered wood. Older wood may have absorbed oils, dust and grime over time, which could impact how the stain is taken up.
Grain Pattern
Wood with a tight grain pattern, such as cherry or maple, will absorb stain differently than wood with a more open grain, like oak or ash. The grain pattern also influences the final look of the stained wood.
Surface Condition
Examine the wood for any damages, like dents, scratches or holes. They will need to be filled and smoothed before staining. Also, be sure to look for any signs of mildew or rot, particularly in older or exterior wood.
Moisture Content
The moisture content of wood can significantly affect stain absorption. Too much moisture can prevent the stain from adhering correctly. Before staining, ensure the wood is thoroughly dry. A moisture meter can provide an accurate reading.
Assessing the wood thoroughly before starting the staining process will help ensure that you choose the correct stain and apply it in a way that brings out the wood’s best qualities.
2. Clean the Wood Surface
Before you can prep for staining, it’s crucial to ensure that the wood is thoroughly clean. Remove any dust, grime or oils that could hinder stain penetration. Use warm, soapy water for general cleaning and consider a wood cleaner for heavily soiled surfaces. Always remember to let the wood dry thoroughly after cleaning.
3. Sand
Start with coarse grit sandpaper and gradually move to finer grit sandpaper for the best results. Sanding also removes mill glaze from new wood and loose fibers from older wood, which makes it an important step when you’re prepping wood to stain.
4. Fill and Repair
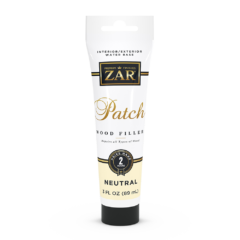
For a professional finish, you cannot ignore any damages, holes or scratches on the wood. Use a wood filler to address the imperfections. Allow the filler to dry completely before sanding it smooth to ensure a uniform surface.
5. Test Stain Compatibility
To ensure the best results, test the stain on a scrap piece of the same wood or an inconspicuous area before applying it to your project. This will help you see how the wood will absorb the stain and what the final color will be.
6. Final Surface Preparation
The final steps of preparing a piece of wood for staining are vital in ensuring a professional and smooth finish. Here are the essential elements to focus on:
Final Sanding
After any repairs or filling is done, give the wood a final sanding. Start with medium-grit sandpaper and progressively move to finer grit. The final sanding should be done with very fine-grit sandpaper, which helps create a smooth surface and opens up the wood’s pores for stain absorption.
Remove Sanding Dust
Use a vacuum, a dry paintbrush or an air compressor to remove the sanding dust from the surface. Follow with a damp cloth or a tack cloth to pick up any remaining dust particles. Any dust left on the surface can mix with the stain and will create a rough texture.
Stir the Stain
Stains can separate over time, so make sure to stir the stain thoroughly to ensure it’s evenly mixed. However, avoid shaking the can because it can create bubbles that could end up on your wood surface.
How to Select the Appropriate Stain
Picking the right stain is a key step in any woodworking project. The best stain does two things — it brings out the wood’s natural beauty and protects it over time.
Stains
Picking the right stain can enhance the natural beauty of the wood while still providing protection.

The ZAR® Interior Stain is an oil-based stain filled with color that gives a deep hue with just a single application. Its thick texture ensures easy application and produces a polished finish, and it’s a versatile product that can be used on many different materials like wood, fiberglass, metal and even painted or pre-finished surfaces. It’s particularly effective on woods that are typically challenging to stain, such as alder, pine, birch and maple.
Additionally, ZAR Interior Stain does not require a pre-stain conditioner for soft woods, like pine or spruce, which saves both time and money.
It can also be used as a glaze on moldings, cabinets and floors for a layered, two-tone look.
Polyurethane Finish
A polyurethane finish will seal your hard work and lend your project longevity and an appealing sheen.
ZAR Interior Oil Base Poly can be used on various surfaces including hardwood floors, cabinets, furniture, bar tops, countertops and woodwork. It takes approximately two hours to dry after applying it to bare wood. This finish is resistant to scratches, and it can endure alcohol and common household cleaners. Maintenance is straightforward — just wipe it with a damp cloth. Brush application will not create any brush marks.
Discover the Best in Stains and Staining Products with ZAR
To ensure a smooth and professional finish on your wood projects, select a brand trusted by the experts. ZAR offers a comprehensive range of wood preparation and finishing products designed to ensure every project’s success. Whether you’re prepping new wood, an outdoor deck, a wood fence or a wooden floor for staining, we have the products to take your project from start to stain seamlessly.
Contact us today to locate a store nearest you!


