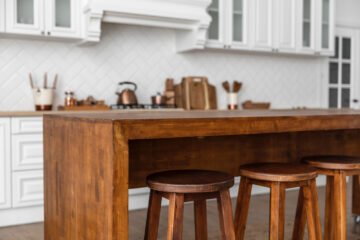
Wood, in its raw form, is undeniably beautiful — but that doesn’t mean it will complement the other design elements you already have in place. Because wood is a natural product, it can vary from tree to tree, even in the same species. However, solid paint colors aren’t always the best solution for getting a cohesive design.
The good news is that any wooden items in your home can be altered by staining, even if the wood has been stained previously. But before diving into a staining project, it is important to test any stain you’re thinking about on an inconspicuous location first to ensure that the final results will be what you want. This article will highlight the guidelines to follow for optimum results when staining interior wood.
Why Utilize Wood Stains?
Interior wood stains can provide a basic level of protection for wood furniture and floors by sealing the surface and helping to resist moisture damage. Stains also enhance the natural color of the wood, making it easier to achieve a coordinated look in your home. By choosing the right stain, you can also highlight the natural beauty of the wood grain.
Finally, stains can be more economical and long-lasting than paint. If you are considering staining your wood furniture or floors, take the time to explore the many options available to find the right stain for your needs.

How to Select the Proper Stain For Your Project

When selecting a stain for your interior wood project, it’s important to consider the look you want to achieve, the type of wood you’re staining and the surface conditions of the wood. The following guidelines will help you choose the right stain.
First, decide what look you want to achieve. There are many types of stains available, from transparent to opaque. If you want to highlight the natural beauty of the wood grain, choose a transparent or semi-transparent stain. If you prefer a more consistent appearance, an opaque stain may be a better choice.
Next, consider the type of wood that you’re staining. There are hardwoods and softwoods, and each will accept stain differently. If you’re not sure which type of wood you have, then make sure to consult with a professional or do some research online.
Finally, consider the surface conditions of the wood. If the wood is unfinished, it will need to be sanded before you can apply the stain. If the wood is already finished, however, then you may only need to clean it before applying the stain. Be sure to follow the manufacturer’s instructions to achieve the best results.
The Necessary Application Tools
Applying a wood stain can be a daunting task, but it doesn’t have to be. With the right tools and some basic information, you can apply a beautiful wood stain in no time.
Be sure to choose the right applicator for the job. There are three main types of applicators: lint-free cloth, foam applicator and natural bristle brush. Brushes are best for smaller projects or detailed work.
Pads are ideal for larger projects or areas with complex shapes. Rollers are perfect for large areas. A cloth applicator is great for projects with a lot of curves or finely-detailed appliques, as it can easily get into crevices.
5 Interior Stain Application Tips
1. Verify Wood is Unfinished
Unless you are glazing your project, which is staining over an existing stain, the wood will need to be clean and dry, free of dust, wax, paint or any other debris that will affect the finish.
2. Sand Wood Lightly
To prepare the wood for staining, begin by sanding with medium-grit sandpaper (120) and finish with fine-grit sandpaper (220) to ensure no scratches remain. Always sand in the direction of the grain, in order to prevent unsightly scars.

3. Pay Attention to How Long You Leave the Stain on Before Wiping
The longer a stain is allowed to sit on the wood surface, the deeper and more vivid the final color will be. Be careful with your timing so that you can obtain a consistent color. Never allow any stain to sit on the wood surface for extended periods, as this will prevent the transparent finish from adhering and can lead to additional problems.
4. Remove Unabsorbed Stain with a Dry Cloth
Under a layer of clear finish, swirling marks caused by a stain-saturated cloth will become more apparent.
5. A Stain Does Not Provide Protection — Apply Polyurethane When Stain Has Set
The main purpose of staining wood is to add color and beauty. The stain is absorbed into the surface pores and provides limited protection. To safeguard your project from scratches and keep the stain looking new, apply a clear coat of polyurethane once the stain has dried to protect both the finish and the wood.

Create the Very Best Aesthetic with ZAR® Interior Wood Stains
ZAR® has been developing stains and polyurethane coatings for interior and exterior applications for decades. Our product lines include protection for wood decks, concrete floors, wood floors, siding, trim, doors and windows. We carry oil-based and water-based products to suit every situation. Our goal is to produce coatings that will last for years and have a minimal impact on the environment — all while making your home and projects stand out.
Contact us today to find a retailer near you.